Category

Highway Safety

jump start a car
Highway Safety, Traffic Facts, Traffic Safety

How do you jumpstart a car or truck, a complete guide


How to Safely Jump-Start a Car With a Dead Battery


How to Safely Jump-Start a Car With a Dead Battery

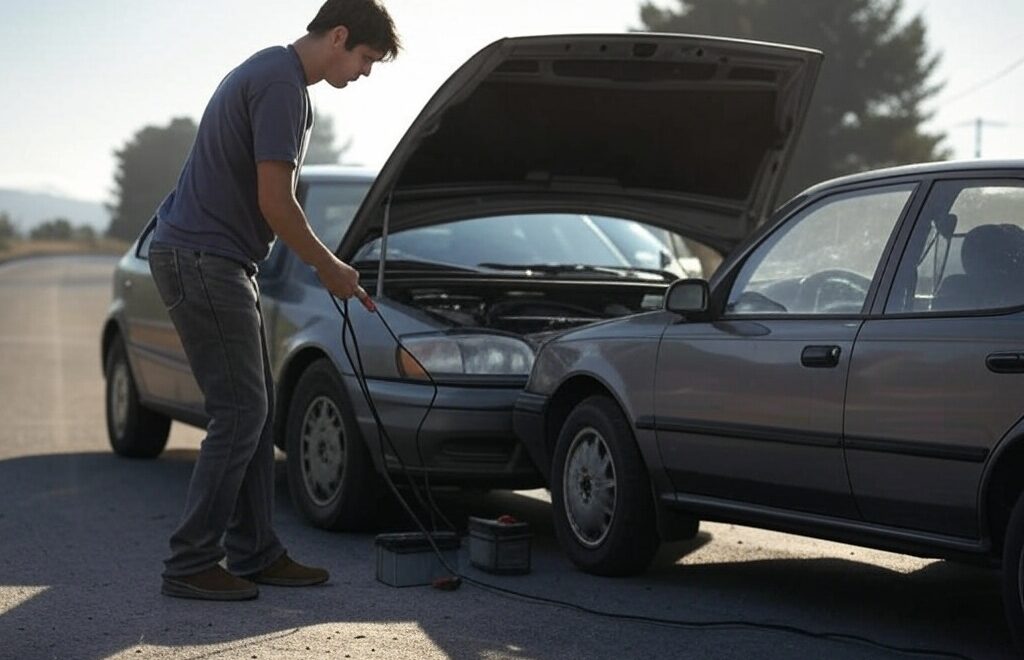
Jump-starting a car with a dead battery is a simple process when done correctly, but safety is critical to prevent injury or vehicle damage. This guide provides step-by-step instructions for using jumper cables or a portable jump starter, along with essential safety precautions and post-jump-start actions.

Items Needed for a Jump-Start

Ensure you have the following before starting:

  • Jumper Cables: Insulated, 10–20 feet, heavy-gauge for better reach and connection.
  • Donor Vehicle or Portable Jump Starter: A working car with a 12-volt battery or a charged portable jump starter.
  • Safety Gear: Work gloves (rubber, nitrile, or leather) and safety glasses to protect against sparks or acid.
  • Cleaning Supplies (Optional): Wire brush and rag to clean corroded battery terminals.
  • Emergency Extras (Optional): Flashlight for nighttime and vehicle owner’s manual for battery location or specific instructions.

Safety Precautions

Car batteries emit flammable hydrogen gas and high currents, posing risks of explosion or electrical damage. Follow these precautions:

  • Safe Positioning: Park vehicles close but not touching, away from traffic, with parking brakes engaged.
  • Power Off: Turn off ignitions, remove keys, and disable all accessories (lights, radio, etc.) in both vehicles.
  • Inspect Battery: Do not jump-start if the battery is cracked, leaking, bulging, frozen, or smells of sulfur, as it may be hazardous.
  • Protect Yourself: Wear gloves and safety glasses; remove metal jewelry to prevent shorts or burns.
  • Avoid Ignition Sources: No smoking or open flames near the battery due to explosive gas risks.
  • Correct Connections: Match 12-volt systems and connect positive (+) to positive, negative (–) to negative to avoid sparks or system damage.
  • Handle Cables Carefully: Prevent clamps from touching each other or metal surfaces until properly connected.
  • Follow Sequence: Connect and disconnect cables in the specified order to minimize spark risks near the battery.
  • Check Manual: Consult the owner’s manual for model-specific instructions or dedicated jump-start terminals.
Warning: Incorrect connections or damaged batteries can cause sparks, explosions, or electrical damage. Proceed with caution and stop if you notice battery damage.

Jump-Starting with Jumper Cables

Use a donor vehicle with a charged 12-volt battery. Follow these steps precisely:

  1. Position Vehicles: Park the donor car nose-to-nose with the dead car, 1–2 feet apart, ensuring they don’t touch.
  2. Prepare Vehicles: Turn off both engines, set transmissions to Park (or Neutral for manuals), engage parking brakes, and disable all accessories.
  3. Locate Batteries: Open hoods, identify positive (+) and negative (–) terminals, and clean terminals if corroded.
  4. Connect Red Cable to Dead Battery: Attach one red clamp to the dead battery’s positive (+) terminal securely.
  5. Connect Red Cable to Donor Battery: Attach the other red clamp to the donor battery’s positive (+) terminal.
  6. Connect Black Cable to Donor Battery: Attach one black clamp to the donor battery’s negative (–) terminal.
  7. Ground Black Cable on Dead Car: Attach the other black clamp to an unpainted metal surface (e.g., engine bolt) on the dead car, away from the battery to reduce spark risk.
  8. Start Donor Vehicle: Start the donor car and let it idle for 1–2 minutes, optionally revving to 1500–2000 RPM.
  9. Start Dead Vehicle: Attempt to start the dead car. If it doesn’t start, wait 30 seconds and try again. If it fails after a few attempts, seek professional help.
  10. Disconnect Cables: With the dead car running, remove cables in reverse order: black clamp from dead car’s ground, black clamp from donor’s negative, red clamp from donor’s positive, red clamp from dead car’s positive. Avoid clamp contact.
  11. Close Hoods: Ensure the jumped car runs smoothly, then close hoods and remove safety gear.
Note: Keep the jumped car running to charge the battery. Do not turn it off immediately.

Jump-Starting with a Portable Jump Starter

A portable jump starter eliminates the need for a donor vehicle. Follow these steps:

  1. Prepare Vehicle and Device: Place the jump starter on a stable surface, ensure the car is off, in Park/Neutral, with the parking brake on, and check the jump starter’s charge level.
  2. Connect Red Clamp: Attach the jump starter’s red clamp to the battery’s positive (+) terminal.
  3. Connect Black Clamp: Attach the black clamp to the battery’s negative (–) terminal or an unpainted engine ground, per the device’s instructions.
  4. Activate Jump Starter: Turn on the jump starter or press its boost button, confirming a safe connection (e.g., green light).
  5. Start Car: Attempt to start the car. If it fails, wait 30–60 seconds and try again, up to 3–5 times. If unsuccessful, seek professional help.
  6. Disconnect Jump Starter: Turn off the jump starter, remove the black clamp, then the red clamp, avoiding contact between clamps or metal surfaces.
  7. Close Hood: Store the jump starter and keep the car running to charge the battery.
Note: Recharge the jump starter after use and store it in a temperate environment to maintain its battery life.

After the Jump-Start

A successful jump-start is only the first step. Take these actions to prevent future issues:

  • Charge the Battery: Drive for 20–30 minutes or let the car idle to allow the alternator to recharge the battery. Driving is more effective than idling.
  • Avoid Immediate Shutdown: Do not turn off the engine until the battery has recharged to avoid needing another jump.
  • Test the Battery and Charging System: Have the battery and alternator tested at an auto shop to identify the cause of the failure.
  • Replace Battery if Needed: If the battery is old (3–5+ years) or fails testing, replace it to prevent future issues.
  • Monitor Performance: Watch for warning signs like dimming lights or a persistent battery light, indicating alternator or electrical issues.
  • Prevent Future Failures: Identify the cause (e.g., lights left on, old battery) and maintain the battery by keeping terminals clean and driving regularly, especially in cold weather.

Conclusion

Jump-starting a car is a valuable skill that can get you back on the road quickly. By prioritizing safety, following the correct connection sequence, and addressing the battery’s condition afterward, you can minimize risks and prevent future breakdowns. Keep jumper cables or a portable jump starter in your vehicle for emergencies, and always consult your owner’s manual for model-specific guidance.

© 2025. All rights reserved.


Continue reading
Utility Work Ahead
Highway Safety

Do my roll-up signs need to be Diamond Grade?

Do My Roll-Up Signs Need to Be “Diamond Grade”? Yes or No?

If you’re setting up a work zone, you’ve likely wondered: Do my roll-up signs need to be Diamond Grade? It’s a common question for contractors, road crews, and safety managers looking to comply with regulations and keep workers and drivers safe. The short answer? It depends on where you’re working and the specific job requirements. Let’s break it down so you can make an informed decision.

What Is Diamond Grade Sheeting?

Diamond Grade retroreflective sheeting (classified as Type XI under ASTM D4956) is a top-tier material that reflects light back to its source—like a car’s headlights—with exceptional efficiency. It’s up to 10 times brighter than Engineer Grade sheeting and twice as reflective as High Intensity Prismatic, offering visibility from 1,300 to 1,600 feet. This makes it a go-to choice for work zones, especially at night or in bad weather. But is it a must-have for your roll-up signs? That hinges on regulations and safety needs.

The National Baseline: MUTCD Standards

The Federal Highway Administration’s Manual on Uniform Traffic Control Devices (MUTCD) sets the foundation for work-zone signage across the U.S. According to Section 6F.02, all temporary traffic control signs—including roll-up signs—must be retroreflective or illuminated to ensure visibility in low-light conditions. The MUTCD doesn’t specify Diamond Grade; it focuses on performance (e.g., being visible and legible). This means states and project specs determine whether Diamond Grade is required or just a smart option.

State Requirements: Who Says Yes to Diamond Grade?

No state explicitly mandates that every roll-up sign must use Diamond Grade sheeting exclusively. However, many states require high-performance retroreflective materials in work zones, and Diamond Grade often fits the bill. Here’s a look at some key examples:

  • Maryland: The Maryland DOT requires retroreflective sheeting for all work-zone signs, often specifying “high-performance” materials like Diamond Grade for maximum visibility on busy roads.
  • Delaware: DelDOT calls for prismatic retroreflective sheeting on roll-up signs, with Diamond Grade commonly used—or required by contract—on major highways like I-95.
  • Virginia: VDOT mandates retroreflective signs in work zones, frequently specifying “high-intensity or better” sheeting, which includes Diamond Grade for high-risk areas.
  • Other States: California, Texas, and New York often use Diamond Grade in high-traffic or nighttime work zones, though they allow flexibility based on project needs. The remaining 44 states follow the MUTCD baseline, with some (like Pennsylvania or Washington) favoring Diamond Grade for critical applications.

Bottom line: Check your state’s DOT manual or project specs. If they demand “high-performance” or “prismatic” sheeting, Diamond Grade is likely a safe bet—or even a requirement.

Why Choose Diamond Grade? The Safety Factor

Even if it’s not required, Diamond Grade sheeting offers unmatched safety benefits. Work zones are risky—lane shifts and reduced speeds confuse drivers, especially at night. Diamond Grade’s brightness gives drivers more time to react, reducing crash risks. Studies show improved sign visibility cuts accident rates, making it a proactive choice for protecting your crew and the public. Plus, its durability (12+ years) means fewer replacements over time.

So, Do You Need It? Here’s How to Decide

Not sure if Diamond Grade is necessary for your roll-up signs? Ask yourself these questions:

  • Where’s the work zone? High-speed roads or urban areas often need brighter signs—think Diamond Grade—while rural, low-traffic zones might get by with High Intensity Prismatic.
  • When’s the work happening? Nighttime or low-visibility conditions (rain, fog) favor Diamond Grade’s superior reflectivity.
  • What’s the contract say? Many DOTs or project bids specify sheeting types. Look for terms like “Type XI,” “Diamond Grade,” or “high-performance retroreflective.”
  • What’s your budget? Diamond Grade costs more upfront but pays off in safety and longevity.

If your state or job doesn’t demand Diamond Grade, you could opt for High Intensity Prismatic (visible from 800–1,200 feet) and still meet MUTCD standards. But for maximum safety and compliance peace of mind, Diamond Grade is hard to beat.

Yes or No? If your state or contract calls for top-tier reflectivity, the answer’s yes—Diamond Grade is the way to go. If not, you’ve got options.

Disclaimer: This article is for informational purposes only and does not constitute legal advice. Regulations for roll-up signs and retroreflective materials vary by state, locality, and project. Always check your local and state laws, as well as specific contract or DOT requirements, to ensure compliance. Contact your state’s Department of Transportation or a qualified professional for the most current and applicable standards.

Continue reading
18 wheel truck
Highway Safety

Truck Weight Limits by State for 2025


Truck Weight Limits by State 2025: Comprehensive U.S. Guide


Truck Weight Limits by State 2025: Comprehensive U.S. Guide

Updated as of April 6, 2025

Introduction to Truck Weight Limits

Trucks are the lifeblood of U.S. commerce, transporting roughly 72% of the nation’s freight by weight, per the American Trucking Associations (ATA). From farm produce to heavy machinery, these vehicles keep the economy rolling across state lines. Yet, truck weight limits in 2025 vary widely across the U.S., shaped by federal guidelines and state-specific rules. These regulations balance economic efficiency, road safety, and infrastructure longevity.

This comprehensive guide dives into truck weight limits by state as of April 6, 2025, covering federal standards, state variations, permit processes, and their impact on the trucking industry. Whether you’re a driver plotting a route or a fleet manager optimizing logistics, understanding these rules is key to staying compliant and efficient on America’s highways.

Federal Truck Weight Regulations Explained

The Federal Highway Administration (FHWA) sets a baseline for truck weight limits on Interstate highways: a maximum gross vehicle weight (GVW) of 80,000 pounds. This includes 20,000 pounds per single axle and 34,000 pounds for a tandem axle group, governed by the Federal Bridge Formula introduced in 1975. This formula calculates allowable weight based on axle spacing to protect bridges and roads from excessive strain—a critical measure given the $275 billion annual cost of infrastructure maintenance.

While Interstates follow this federal cap, states have flexibility on non-Interstate roads. They can impose stricter limits to safeguard aging infrastructure or grant higher weights via permits to support local industries like mining or agriculture. Seasonal factors, such as frost laws in northern states during spring thaws, add further complexity. This federal-state dynamic creates a patchwork of 2025 truck weight regulations that demands careful navigation.

Truck Weight Limits by State in 2025

Below is a detailed state-by-state breakdown of maximum GVW limits without special permits, unless noted, as of April 2025. These limits reflect infrastructure capacity, economic needs, and regional priorities—think Michigan’s industrial hauls or Maine’s timber exemptions. For precise permit details or seasonal rules, check each state’s DOT website linked below.

State Max GVW (lbs) Notes Authority Link
Alabama 80,000 Permits up to 100,000 lbs; seasonal restrictions apply Alabama DOT
Alaska 80,000 Permits up to 145,000 lbs on state roads; supports resource extraction Alaska DOT
Arizona 80,000 Permits up to 129,000 lbs for mining, agriculture Arizona DOT
Arkansas 80,000 Permits up to 90,000 lbs on state roads; timber industry focus Arkansas DOT
California 80,000 Permits up to 95,000 lbs for international containers; strict axle rules Caltrans
Colorado 80,000 Permits up to 97,000 lbs; mountain roads limit enforcement Colorado DOT
Connecticut 80,000 Single axle up to 22,400 lbs; permits for urban routes Connecticut DOT
Delaware 80,000 Permits up to 100,000 lbs; small state, strict bridge limits Delaware DOT
Florida 80,000 Permits for agriculture/construction; hurricane prep exemptions Florida DOT
Georgia 80,000 Permits up to 100,000 lbs; supports port traffic Georgia DOT
Hawaii 88,000 Single axle up to 22,500 lbs; island-specific rules Hawaii DOT
Idaho 80,000 Permits up to 129,000 lbs; logging, farming focus Idaho DOT
Illinois 80,000 Permits up to 88,000 lbs; Chicago metro exemptions Illinois DOT
Indiana 80,000 Single axle up to 22,400 lbs; manufacturing hub Indiana DOT
Iowa 80,000 Permits up to 96,000 lbs for ag goods; seasonal frost laws Iowa DOT
Kansas 80,000 Permits up to 85,500 lbs; grain transport focus Kansas DOT
Kentucky 80,000 Permits up to 96,000 lbs; coal, bourbon industries Kentucky DOT
Louisiana 80,000 Permits up to 88,000 lbs; oil, gas transport Louisiana DOTD
Maine 100,000 6 axles on Interstates; timber industry driver Maine DOT
Maryland 80,000 Permits up to 100,000 lbs; port, urban focus Maryland DOT
Massachusetts 80,000 Permits up to 99,000 lbs; aging bridges limit increases MassDOT
Michigan No cap Up to 170,000 lbs with 17 axles; industrial legacy Michigan DOT
Minnesota 80,000 Permits up to 90,000 lbs; frost laws in spring Minnesota DOT
Mississippi 80,000 Permits up to 95,000 lbs; timber, poultry Mississippi DOT
Missouri 80,000 Permits up to 96,000 lbs; central logistics hub Missouri DOT
Montana 80,000 Permits up to 131,000 lbs; mining, ranching Montana DOT
Nebraska 80,000 Permits up to 95,000 lbs; agribusiness focus Nebraska DOT
Nevada 80,000 Permits up to 129,000 lbs; mining support Nevada DOT
New Hampshire 80,000 Permits up to 99,000 lbs; rural road limits New Hampshire DOT
New Jersey 80,000 Permits up to 100,000 lbs; dense urban routes New Jersey DOT
New Mexico 80,000 Permits up to 86,400 lbs; oil, gas focus New Mexico DOT
New York 80,000 Permits up to 117,000 lbs (7 axles); Thruway rules New York DOT
North Carolina 80,000 Permits up to 94,500 lbs; furniture, textiles North Carolina DOT
North Dakota 80,000 Permits up to 105,500 lbs; oil, agriculture North Dakota DOT
Ohio 80,000 Permits up to 120,000 lbs; manufacturing hub Ohio DOT
Oklahoma 80,000 Permits up to 90,000 lbs; energy sector Oklahoma DOT
Oregon 80,000 Permits up to 105,500 lbs; timber, tech Oregon DOT
Pennsylvania 80,000 Permits up to 125,000 lbs; steel, coal Pennsylvania DOT
Rhode Island 80,000 Single axle up to 22,400 lbs; small state limits Rhode Island DOT
South Carolina 80,000 Permits up to 100,000 lbs; port traffic South Carolina DOT
South Dakota 80,000 Permits up to 129,000 lbs; agriculture, ranching South Dakota DOT
Tennessee 80,000 Permits up to 90,000 lbs; logistics hub Tennessee DOT
Texas 80,000 Permits up to 84,000 lbs; oil, cattle focus Texas DOT
Utah 80,000 Permits up to 129,000 lbs; mining, energy Utah DOT
Vermont 80,000 Permits up to 99,000 lbs; rural infrastructure Vermont DOT
Virginia 80,000 Permits up to 100,000 lbs; port, military Virginia DOT
Washington 80,000 Permits up to 105,500 lbs; tech, agriculture Washington DOT
Washington, D.C. 80,000 Federal limits apply; urban constraints D.C. DOT
West Virginia 80,000 Permits up to 90,000 lbs; coal, timber West Virginia DOT
Wisconsin 80,000 Permits up to 90,000 lbs; dairy, paper Wisconsin DOT
Wyoming 80,000 Permits up to 117,000 lbs; energy, ranching Wyoming DOT

Permits and Enforcement of Truck Weight Limits

For loads exceeding standard limits, states issue overweight permits, often requiring additional axles, designated routes, or time restrictions to minimize road damage. Permit costs vary widely—$15 in Kansas for a single trip up to 85,500 pounds, versus $500 or more in Michigan for annual permits exceeding 150,000 pounds. Some states offer industry-specific exemptions, such as California’s allowance for international containers or Iowa’s seasonal agricultural permits.

Enforcement is rigorous, utilizing weigh stations, portable scales, and Weigh-in-Motion (WIM) technology embedded in highways. Penalties for violations range from modest fines ($10 per pound over in Texas) to steep punishments ($65 per pound in Illinois), with repeat offenders risking license points or jail time. Overloading not only incurs financial penalties but also increases wear on brakes and suspension, raising safety risks—a 2021 FHWA study estimated overloaded trucks contribute to 15% of pavement damage nationwide.

Industry Impacts and Ongoing Debates

Truck weight limits shape more than just daily operations—they influence economic and environmental outcomes. The ATA argues that raising the federal limit to 91,000 pounds with an additional axle could reduce truck trips by 14%, cutting fuel consumption and emissions. A 2023 study by the National Academy of Sciences estimated this could save $1.2 billion annually in shipping costs. States like Maine and Michigan, with higher limits, cite fewer accidents per ton-mile as evidence of efficiency gains.

However, opposition is fierce. The Coalition Against Bigger Trucks (CABT) warns that heavier trucks exacerbate bridge deterioration—over 47,000 U.S. bridges were structurally deficient in 2024, per the FHWA. Safety advocates highlight that a truck’s stopping distance increases by 30% when loaded beyond 80,000 pounds, contributing to 5,600 fatal truck crashes in 2021. Rail companies also lobby against increases, fearing a loss of freight to highways. In Congress, bills like the Safe Highways and Infrastructure Preservation Act (SHIPA) aim to freeze limits, while pro-trucking proposals stall amid budget concerns.

For truckers, the stakes are practical: a load legal in Idaho might trigger fines in Oregon, forcing detours or offloading. Fleet operators invest in compliance tools like axle weight calculators and telematics, but the patchwork of rules remains a logistical headache. As infrastructure funding debates heat up in 2025, weight limits will likely stay a flashpoint between progress and preservation.

Conclusion: Navigating Truck Weight Limits in 2025

Navigating truck weight limits requires diligence and adaptability. From federal standards to state-specific quirks, these regulations reflect a complex interplay of safety, economics, and infrastructure realities. Truckers and fleet managers must stay informed—checking DOT websites, securing permits, and planning routes—to keep goods moving legally and safely across America’s highways in 2025. As debates over limits evolve, this guide serves as a critical resource for understanding the rules today and anticipating changes tomorrow.

Disclaimer: This article provides general information on truck weight limits by state as of April 6, 2025, based on available data. Regulations may change, and specific limits or permit requirements can vary by route, vehicle type, or season. Always consult official state Department of Transportation (DOT) resources or legal professionals for up-to-date, authoritative guidance. xAI is not responsible for inaccuracies or decisions made based on this content.


© 2025 Traffic Safety Guide. All rights reserved.


Continue reading
Highway Safety

What is the Ideal Highway Drving Speed?


The Ideal Speed to Drive on Highways


The Ideal Speed to Drive on Highways

By TrafficSafe Today

Introduction

Determining the “ideal” speed to drive on highways can be a nuanced topic. While
speed limits and regulations differ across countries—and sometimes even within
regions of the same country—experts generally agree that striking a balance
between safety, efficiency, and legality is key. This article aims to provide
a broad overview of factors that influence what might be considered an “ideal”
highway driving speed.

Following Posted Speed Limits

The most straightforward guideline for choosing your driving speed is to follow
the posted speed limit. These limits are typically set by local or national traffic
authorities and are informed by studies on:

  • Road design and capacity
  • Accident statistics
  • Average traffic flow
  • Environmental factors (e.g., terrain, weather patterns)

In the United States, for instance, highway speed limits commonly range between 55
and 70 miles per hour (mph), although some rural stretches of highway may allow up
to 80 mph or more. In many European countries, limits often range from 90 to 130
kilometers per hour (km/h), depending on location, road conditions, and national
regulations.

The 85th Percentile Rule

Traffic engineers often refer to the “85th percentile rule” when setting speed
limits. This principle suggests that the majority of drivers naturally choose
a safe and reasonable speed for road conditions. By measuring how fast 85% of
vehicles travel on a given stretch of road, authorities can determine a
realistic—and therefore safer—speed limit.

While this approach helps reduce speeding violations and promote smoother traffic
flow, it does not eliminate the need to adjust driving speeds for current conditions.
Rain, snow, heavy traffic, road construction, and other factors can make even a
posted speed limit less than ideal in certain situations.

Balancing Safety and Efficiency

Maintaining a consistent speed that keeps pace with the flow of traffic is usually
considered safer than driving significantly slower or faster than other vehicles.
Driving well below the prevailing speed can cause abrupt lane changes and sudden
braking, increasing the risk of collisions. Conversely, driving too fast reduces
reaction time and makes it harder to respond to unexpected hazards.

Key points to keep in mind:

  • Always adjust your speed for adverse weather and visibility conditions.
  • Keep a safe following distance to allow for adequate reaction time.
  • Ensure that you are comfortable and in full control of your vehicle, free
    from distractions like mobile phones.
  • Monitor changes in speed limits or warning signs, especially in work zones.

Fuel Efficiency Considerations

Fuel efficiency often peaks at moderate speeds—typically between 50 and 60 mph
(80 and 96 km/h) for many vehicles—though the exact range can vary based on engine
type, aerodynamics, and vehicle load. Driving above these speeds can increase
aerodynamic drag, which in turn can lower overall miles per gallon (MPG) or
kilometers per liter (km/L).

From an environmental and cost-saving perspective, maintaining a moderate,
steady speed can help reduce fuel consumption. That said, you should still keep
up with traffic flow and follow local regulations; never compromise safety by
traveling significantly slower than the speed limit in a fast-moving lane.

Local Laws and Guidelines

The ideal speed can also be shaped by local laws or recommended practices. For
example, some regions have “variable speed limits” that change in real time based
on traffic flow, weather, or road incidents. Meanwhile, certain portions of the
German Autobahn have no fixed speed limit, though a “recommended speed” (usually
130 km/h) is still advised for safety and liability reasons.

According to organizations like the

National Highway Traffic Safety Administration (NHTSA)

in the United States and the

European Commission’s Road Safety Policy

in the EU, observing speed limits and adjusting to current road conditions
significantly reduce the risk of road traffic collisions.

Conclusion

While there is no one-size-fits-all “ideal speed” that applies to every highway
and every situation, the general rule of thumb is to adhere to posted speed limits
and stay in harmony with the flow of traffic. This helps ensure safety and reduces
congestion. Factors like road design, prevailing conditions, and the physical
capabilities of your vehicle also play a vital role in determining the most
appropriate speed.

Ultimately, defensive driving habits—respecting other road users, staying alert,
and exercising caution—are just as important as the number on your speedometer.
By considering all these elements, drivers can help create a safer, smoother,
and more efficient journey for everyone on the road.

© 2025 TrafficSafe Today


Continue reading